
How to achieve High Magnification in Macro Photography
The world of macro photography has always fascinated me like any other person. In this article I'll explain how do I achieved high magnification. For most of my close-up work I use AF Micro-Nikkor 60mm f/2.8D lens. The benefits of using a 60mm instead of 105mm macro lens are-
A 60 mm lens can be used as a Normal lens
It's a very good lens for copying object without distortion
An excellent macro lens for small insect and static object. (So long I don't have to bother about working distance)
With a regular macro lens we can take picture of a 36 mm long object directly and this is known as 1X magnification or 1:1 or Life size. For higher magnification beyond 1:1 Canon has a unique macro lens MP-E 65mm f/2.8 that can give 5X magnification of life size (5:1) at a cost of $1000. This is not an affordable and meaningful purchase for most of us. And Nikon doesn't have anything equivalent. As a long time Nikon user I often try to find out my way pass these hurdles with small expense.
Gears that I'll be using are as follows-
AF Micro-Nikkor 60mm f/2.8D
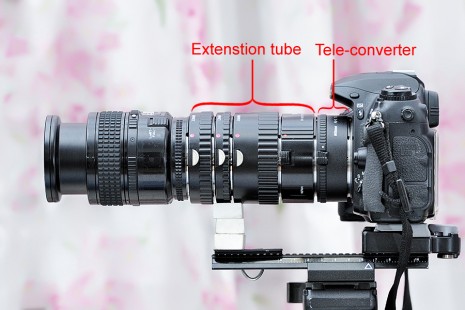
AF extension tube (12mm + 20mm + 36mm + 26mm = 94mm)
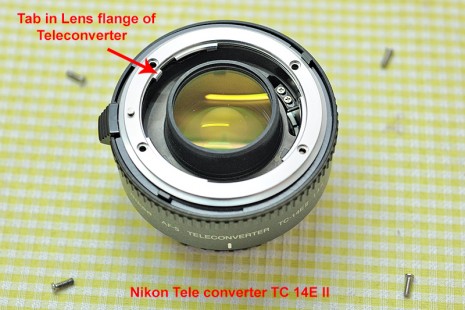
Nikon TC-14E II (1.4x) Tele-converter
First -
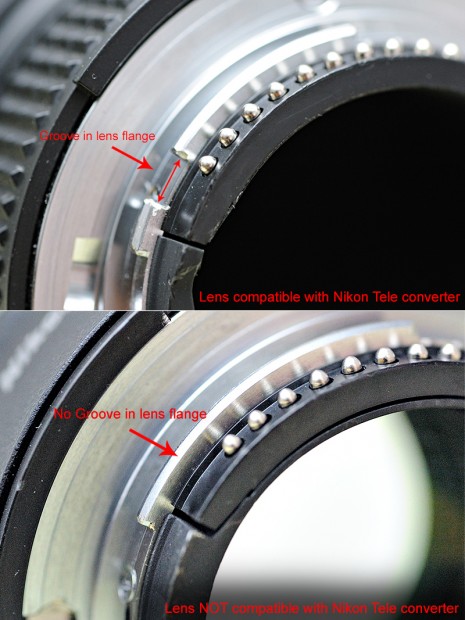
Nikon TC-14E II Tele-converter has a tab in its front side of F-mount. This prevents it from being attached to most lenses except the compatible ones where a groove in rear flange allows this tab to pass through.
Second -
The front element of a Tele-converter bulges out, so it can't be attached with the AF Micro-Nikkor 60 mm f/2.8D lens as it will damage the rear element of the macro lens.
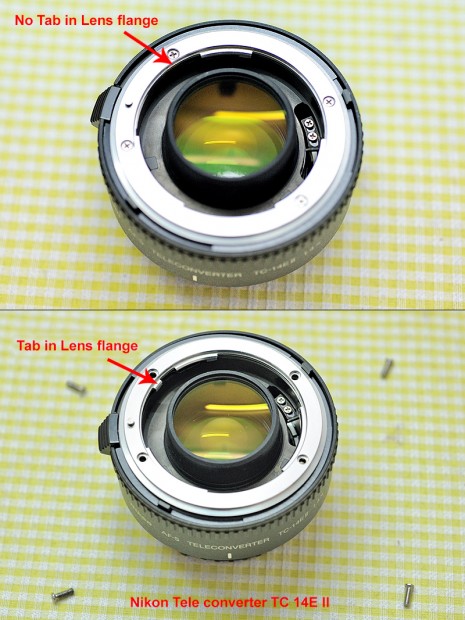
Solution to First Problem
The only solution to this Tab problem is to remove it. Tools needed-
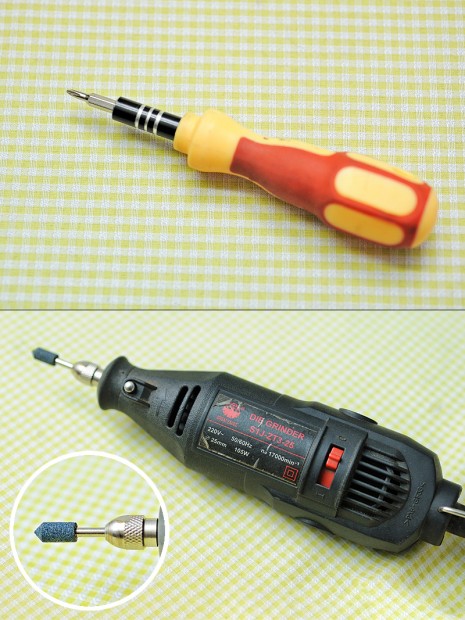
Good star Screwdriver
Compact electric grinder
Steps
*This procedure voids the warranty of the product & should be done at your own risk*
1. Remove the 4 screws that hold the front ring of the F-mount.
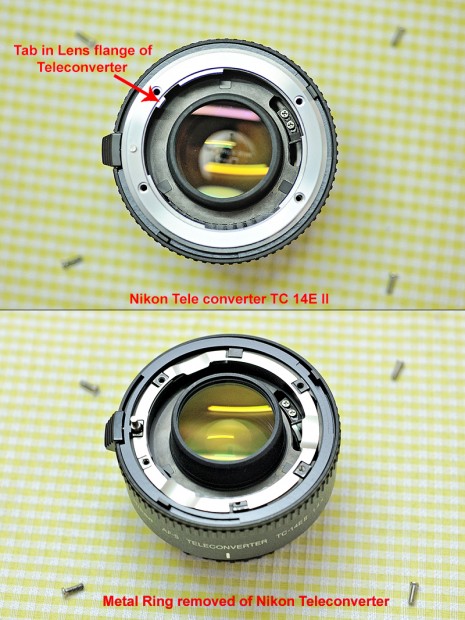
2. Carefully lift the ring without disturbing the components below it. (There are 4 thin metal plates below this ring - if they are disturbed you will have problem engaging the AI aperture coupling)
3. Now use the fine tip of the electric grinder to grind away the tab. Don’t try to remove at one go. Take it off bit by bit. It will give a nice finish. Be very careful not to damage the surrounding parts.
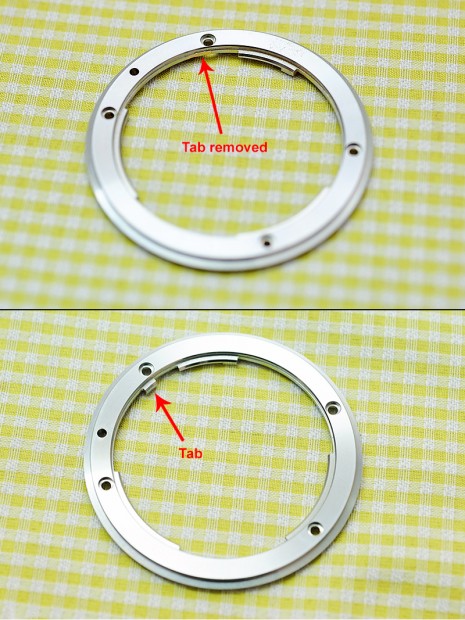
4. Clean the ring properly so it doesn’t have any dirt and screw it back in right place.
Solution to the Second problem
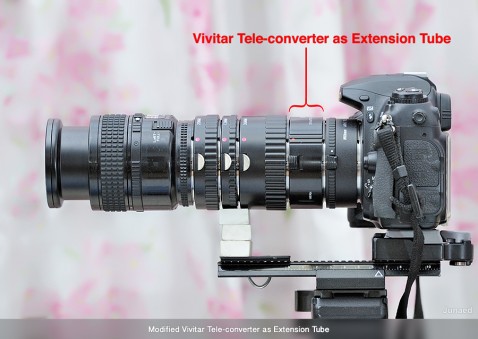
Attaching an extension tube in between the lens and Tele-converter creates space so the front element of Tele-converter will no longer hit the rear element of the lens. I found that regular Kenko or Vello extension tubes have narrow inner tube which doesn’t allow the front of Tele-converter to fit in. The inner tube diameter required to Tele-converter to fit in is around 32 mm. Kenko or Vello has a diameter 30 mm. So I used a Modified Vivitar Tele-converter as an Extension Tube (How to convert a Tele converter to an Extension Tube) which has an inner tube diameter of 33 mm.
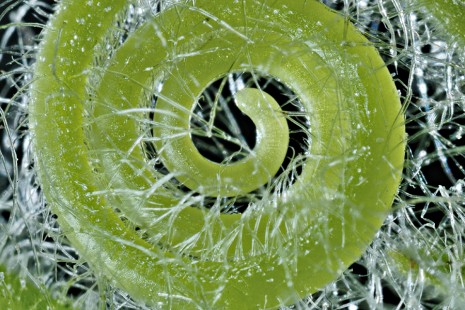
After fitting the parts together I get 4X magnification. This means you can take a picture of 9 mm object in a full frame camera and 6 mm object in APS or crop camera. Here are some pictures with this setup taken at various magnification.
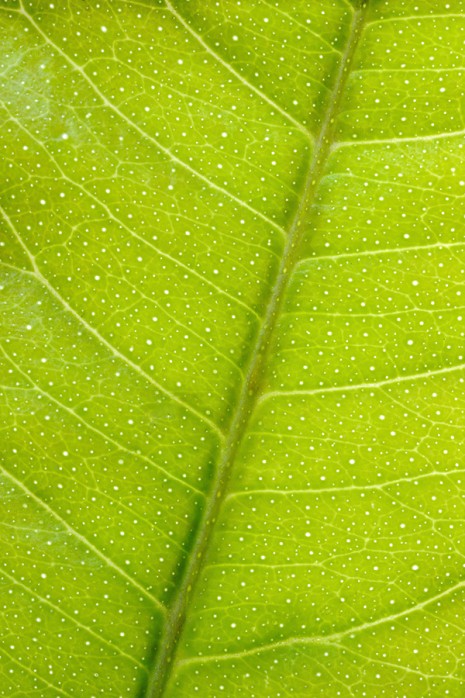
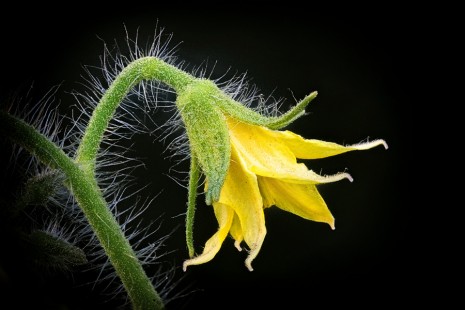
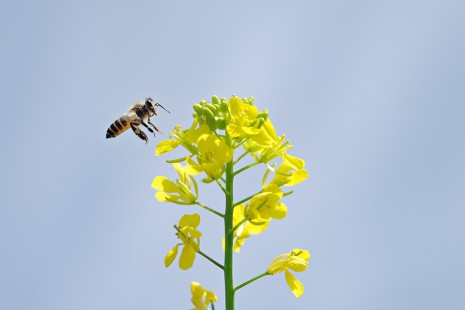
Magnification - 1X (36mm) = Camera - Nikon D700; Lens - 60 mm/2.8

Magnification - 3X (12mm) = Camera - Nikon D700; Lens - 60 mm/2.8; AF Extension tube

Magnification - 4X (9mm) = Camera - Nikon D700; Lens - 60 mm/2.8; AF Extension tube; Tele-converter - TC 14E II

Magnification - 4X (6mm) = Camera - Nikon D200; Lens - 60 mm/2.8; Extension tube; Tele-converter - TC 14E II
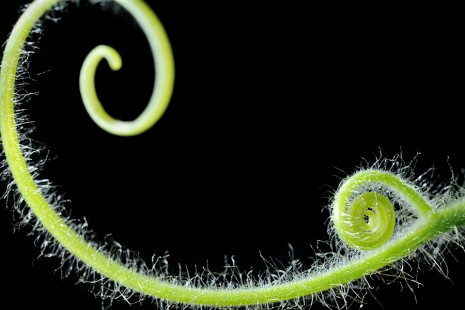
Magnification - 1X (36mm) = Camera - Nikon D700; Lens - 60 mm/2.8
Magnification - 4X (6mm) = Camera - Nikon D200; Lens - 60 mm/2.8; Extension tube; Tele-converter - TC 14E II
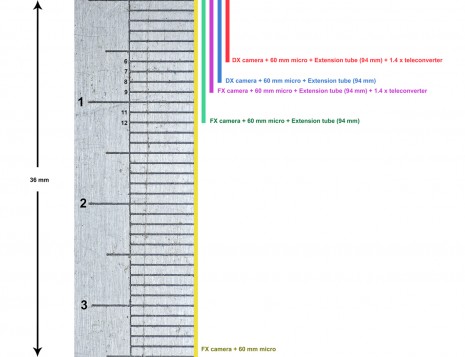
Magnification Chat
This chart clearly shows which combination will give you how much magnification. This technique gives excellent result at high magnification. To me its like a Nikon MP-65E against the expensive Canon MP-65E macro lens which doesn't have a focusing ring.
Minimum working distance
This setup = at 4X magnification minimum working distance is 4 cm.
Canon MP-65E = at 5X magnification minimum working distance is 4.1 cm.